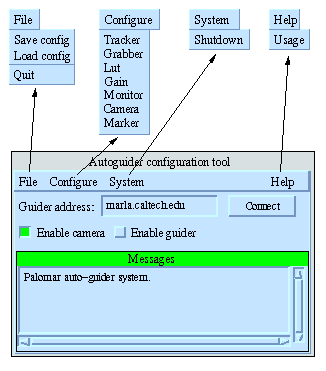
The following figure shows the main window of the autoguider configuration tool, along with its menus. The contents of the menus will be described further below.

Note that this tool also provides a message area that shows the most recent messages received from the autoguider. This may be of use to night assistants if they can't see the main autoguider display. However, be warned that if messages are being generated by the autoguider faster than they can be sent to the configuration tool over the ethernet, then some messages will be omitted. Error messages will be accompanied by a bleep to get your attention.
configure_autoguider hostnamewhere hostname is the name of the autoguider computer (For the 200" this is marla). This will start the program and connect to the running autoguider. If the connection is subsequently lost, it can be reestablished by pressing the Connect button in the main window. If the connection fails, check that the autoguider is running, and that you are running the configuration tool on a computer that is attached to the same ethernet segment as the autoguider.
Once connected to the autoguider, the configuration parameters that
are currently in use can be viewed and modified using dialogs selected
from the Configure menu. Most of the displayed
parameters can also be set directly from the main autoguider display, and this is the best way
to prepare them. A few parameters, however, can only be set from the
configuration program (or by editing the configuration file by
hand). These include the video format of the monitor, the video format
of the camera, and the exact values of camera pixel sizes. The latter
is only useful if the automatic pixel-size
calibration facility on the autoguider display fails for some
reason. The configuration tool is also the only way provided for
telling the autoguider to save it's current configuration parameters,
or to load alternate ones from a file.
Once suitable parameters have been established for an instrument, they should be saved to an instrument configuration file, via the Save config option in the File menu. The name of the file should exactly match the name by which the instrument is known to the TCS.
Note that the Enable camera and Enable guider buttons perform the same functions as the ENABLE buttons of the Frame-grabber and Autoguider control panels on the main autoguider display. These may be useful to night assistants.
Each entry of the Configure menu brings up a form of modifiable attributes. Most of these attributes have already been described in the documentation of the autoguider display. Hence, the following sections only discuss the few facilities that are not accessible from the autoguider display.
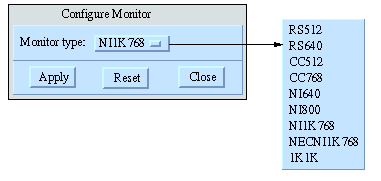
This dialog allows you to change the video format of the autoguider display monitor. Hopefully this won't be necessary, because video formats of less than 1K by 768 pixels don't have room to display all of the available controls. The available formats are briefly described in the documentation the of Monitor configuration object in the software architecture section. More details can be found in the Imaging Technology documentation.
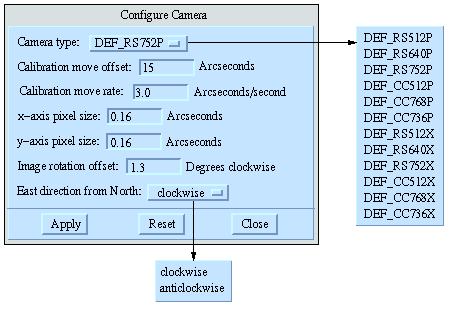
The Configure Camera dialog configures the video format of guider cameras and their mounted geometry with respect to the sky.
The video format of the camera can be changed via the Camera Type: menu. The available formats are briefly described in the documentation of the Camera configuration object in the software architecture section. More details can be found in the Imaging Technology documentation. If in doubt, simply try out each format in turn.
Guide-cameras mounted on different instruments have differing scales and orientations with respect to the sky. In general you should use the automatic calibration facility provided on the main autoguider display to determine appropriate values, but failing that you can enter values directly into the x-axis pixel size and y-axis pixel size fields and configure the reflection parity with the East direction from North menu. The Image rotation offset field specifies a correction offset to add to the approximate rotation angle supplied by the TCS. A positive angle corresponds to a clockwise rotation of the compass rose.
The rest of the parameters have already been described in the autoguider display documentation.
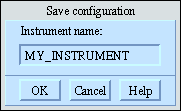
When you have configured the autoguider for a given instrument, you can save the configuration in a file on the Sun host of the autoguider. If you name the file after the instrument, using the same name as provided to the TCS, then whenever the instrument is installed, this configuration file will automatically be read when the autoguider is initialized, and thereafter whenever the Configure button on the autoguider-display is pressed. If the correct instrument name is currently registered with the TCS and the TCS is connected to the autoguider, then the correct name will already be displayed in the Instrument name field.
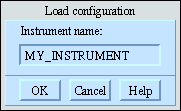
To explicitly load a previously saved configuration, enter the name by which the configuration was saved and press the OK button.
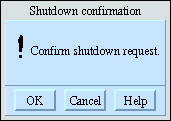
When the shutdown system-menu button is pressed a confirmation dialog is displayed. If it's OK button is pressed, then the autoguider will be shut down completely and will have to be restarted, either by logging in to the autoguider computer and typing:
sp autoguideror by pressing the reset button on the front of the autoguider computer.